As an Amazon Associate, we earn from qualifying purchases. Some links on this site are affiliate links at no extra cost to you. Our recommendations are based on thorough research and editorial judgment.
Compact Storage Solutions for Utility Extension Gear
Use 24-inch WR-2401 wall modules mounted at 12-inch vertical intervals so you can free space. Mount HH-600 hooks at 48 inches, spaced 8 inches apart, to keep cords untangled. Install CR-350R reels at 72 inches above benches for 50 ft cable storage. Fit 24×12 shelves rated 200 lb with 12x8x4 labeled bins PT-4G grounded strip for chargers. Use 100 lb anchors into studs, select 12 AWG cords, inspect quarterly. Continue for setup and safety guidance.
Key Takeaways
- Mount a 24-inch wall rack (WR-2401) with HH-600 hooks to free floor space and keep cords untangled.
- Use retractable (CR-350R) or manual reels (MR-100) above workbenches to store 25–50+ foot cords compactly.
- Store small accessories in labeled clear bins (10x7x5 or 18x12x12) on 12-inch-deep adjustable shelves.
- Utilize overhead racks or ceiling tracks for bulky seasonal extensions, keeping clearance 12 inches above vehicle areas.
- Follow electrical safety: use proper AWG cords, avoid daisy-chaining, inspect cords quarterly, and replace damaged units immediately.
Why Organized Extension Gear Saves Time and Space
You may be interested

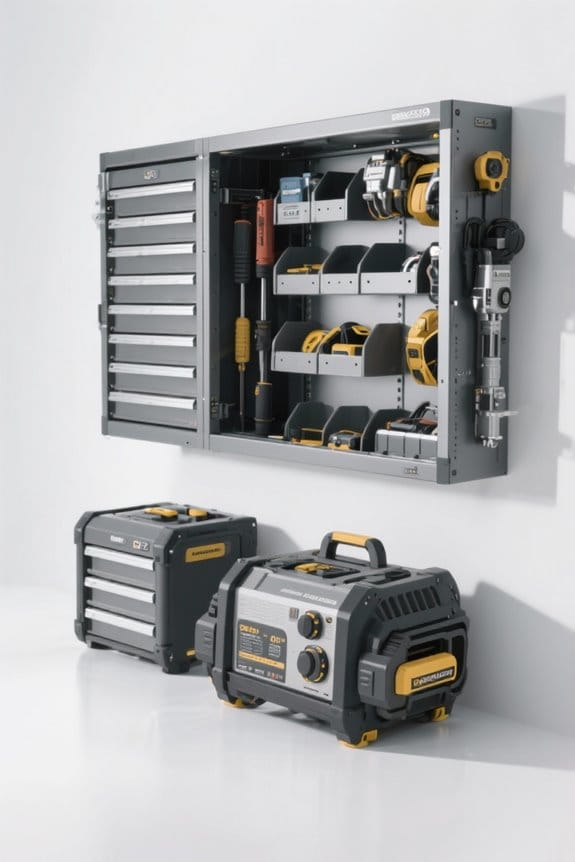
A single 24-inch wall-mounted rack (model WR-2401) can free up to 50% of floor space in a 10-by-12-foot garage. The system provides organized solutions for extension gear using 24-inch modules and vertical spacing at 12-inch intervals. The technician mounts WR-2401 at 60 inches above floor level, securing it with four 3/8-inch lag bolts into studs spaced 16 inches on center. Labeled 2-quart containers fit on shelves measuring 12 by 8 by 4 inches, improving garage storage and inventory control. Cord reels and portable tools are stored on dedicated hooks 8 inches apart to avoid tangling. Regular inspection every three months prevents moisture damage and pest intrusion. Clear labeling and consistent placement streamline tool organization and reduce search time. It saves time and reduces waste. Ensure extension cords meet UL/CSA/IEC certification standards to reduce safety risks during storage and use.
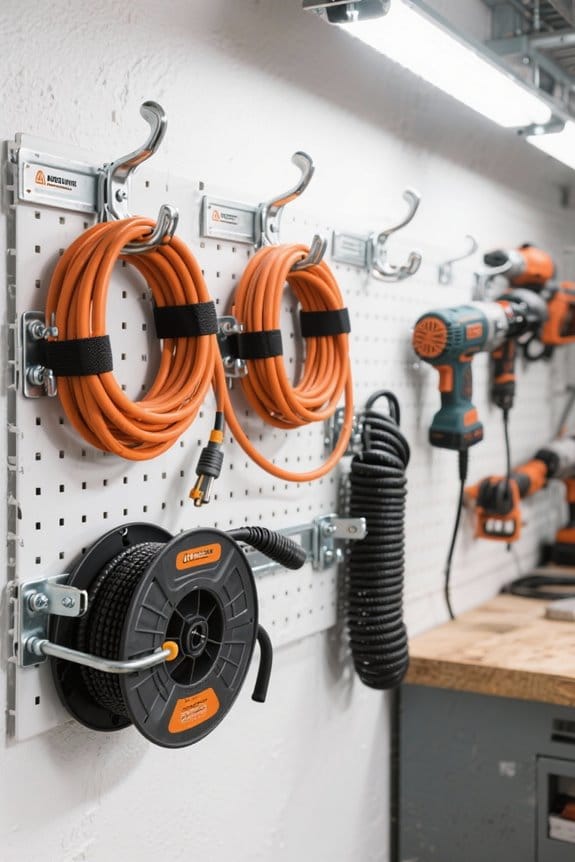
Wall-Mounted Racks and Hooks for Cords

Several 6-inch heavy-duty hooks (model HH-600) mounted at 48 inches and 12-inch vertical intervals keep cords untangled and accessible. The guide recommends wall-mounted storage solutions like pegboards, steel racks, and HH-600 hooks to store utility extension cords neatly. Install a 24-by-48 inch pegboard at 48 inches from floor, then mark 12-inch vertical spacing for hook rows. Mount anchors rated 100 lb at studs or use heavy-duty toggle bolts where studs are absent. Loop each cord on a separate hook, label the hook with cord length and gauge, and color-code for task identification. This setup preserves vertical space, clears floor area, and reduces trip hazards. Periodic inspection for wear and secure fastenings is advised every six months. Replace damaged hooks immediately to maintain safety standards. For increased durability, consider storage units made of powder-coated steel to resist scratches and rust.
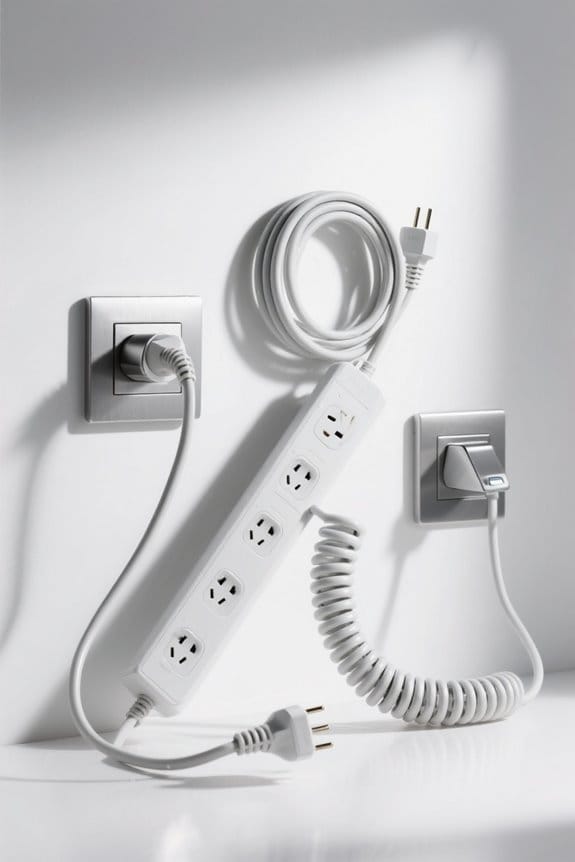
Retractable and Manual Cord Reels
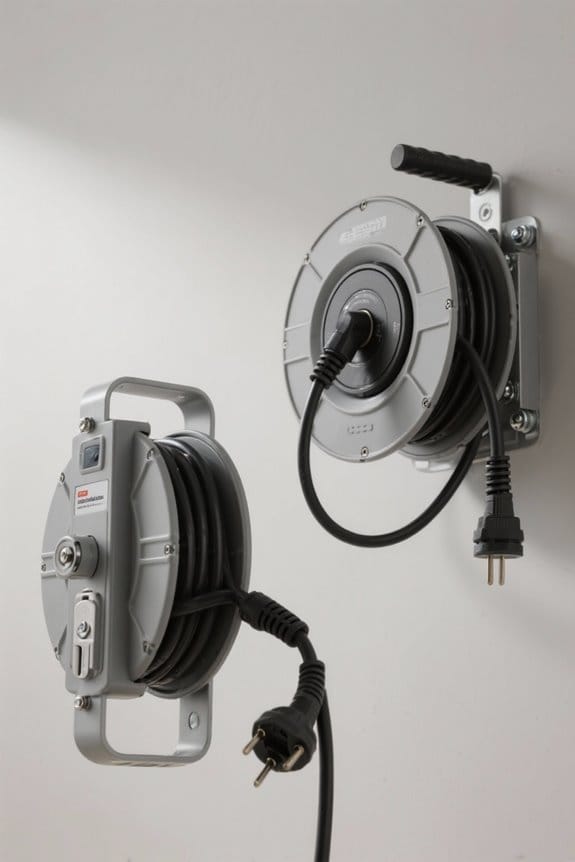
Many garages use retractable cord reels (model CR-350R) to keep extension cords organized and off the floor. The CR-350R retracts 50 feet of 12-gauge cord with a 15-pound spring tension, reducing tangles and wear. Install the reel at 72 inches height using a 3/8-inch lag bolt into a stud, mark, drill, and mount. Manual cord reels like model MR-100 offer 25 to 100 foot options, requiring hand winding for precise storage. Choose weather-resistant materials for outdoor use and models with built-in circuit breakers and swivel hooks. To optimize garage space, position reels above workbenches or ceiling tracks, spacing 24 inches from adjacent fixtures. For safe use, test retraction before each session, and replace frayed cords immediately. You can lock the reel with its detent. Selecting reels compatible with SJTW jackets helps ensure outdoor durability and safety.
Vertical Shelving for Power Tools and Chargers
Vertical shelving saves floor space by using 12-inch-deep racks mounted to studs at 16-inch centers to hold power tools and chargers. These storage solutions use adjustable shelves (24″x12″ min) and powder-coated steel brackets, model PS-12X24, rated 200 lb per shelf. Install at 48-inch starting height, then space shelves 6–14 inches apart for drills, saws, and batteries. Integrate a grounded power strip (code PT-4G) on a 2×4 mounting plate to charge multiple batteries. Use clear bins labeled with contents and charger types, size 10x7x5 inches, for accessories. Place frequently used power tools on lower shelves at eye to waist level. Secure all units with 3-inch wood screws into studs and check level and load before regular use. Periodic inspection every six months preserves safety and functionality. For long runs and heavier loads, consider using 18 AWG to reduce voltage drop and improve efficiency.
Overhead Storage Options for Bulky Items
Often, overhead storage uses unused ceiling space to store bulky items like seasonal decorations and camping gear. The guide recommends installing 2×2 wooden beams, cut to 48 inches, spaced 24 inches on center. Step 1: mark studs with a stud finder model SF-200. Step 2: pre-drill 3/16-inch holes and fasten beams with 3-inch wood screws, code WS-300. Step 3: assemble a 4×2-foot platform using 3/4-inch plywood rated PS-¾. Adjustable overhead storage racks, model OR-120, offer 12-inch to 36-inch height adjustment and 200 lb capacity per bay. Modular units allow reconfiguration without affecting the garage floor. For safety, distribute weight evenly and label load limits on each bay. Inspect fasteners every six months for secure attachment. Consider using modular, stackable systems to allow reconfiguration and optimized organization as needs change.
Clear Bins, Labels, and Color-Coding Systems
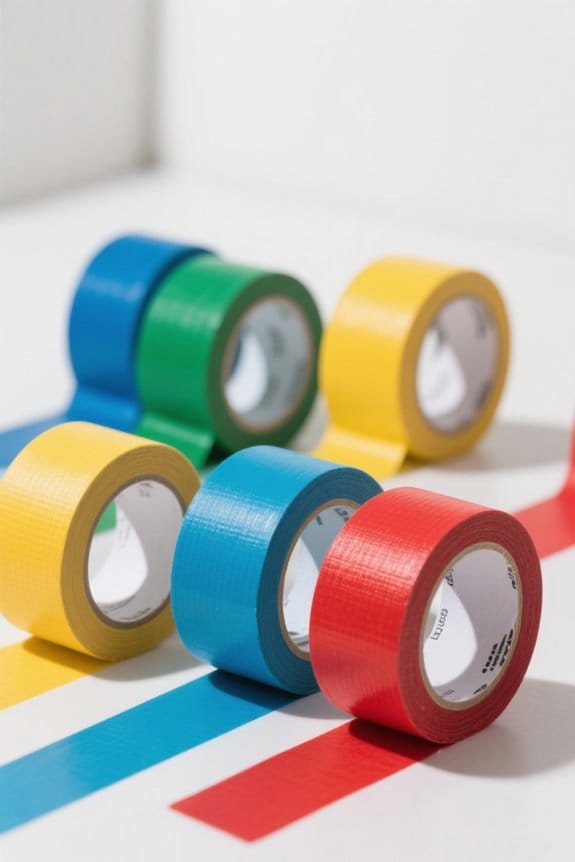
Several clear bins (model CB-12, 12x9x6 in.) allow immediate visual identification of cords and accessories and reduce time spent searching. Stack CB-12 units up to four high, using interlock rims to maximize vertical storage in a 48-inch shelf. Sort items into categories: cords, tools, accessories, and spares; assign one primary category per bin. Apply adhesive labels, printed in 12-point font, centered on the short side for easy reading. Use color-coding systems with red, blue, green, yellow bins or label strips to indicate function or length. Update labels quarterly or when contents change to maintain accuracy. For heavy cords, place bins on lower shelves and secure lids with durable metal clips. Maintain an index sheet showing product codes and bin locations. Include barcode tags for faster retrieval daily. Confirm load capacity limits for shelving before stacking to ensure safe weight distribution and stability.
Portable Carts and Mobile Workstations
One portable cart, model PC-24 (36x18x40 in.), provides immediate access to tools and equipment while improving mobility on job sites. The unit demonstrates common features of portable carts, with three tiers, two adjustable shelves, and five compartments for hand tools and power tools. A recommended setup sequence: 1) mount lockable drawer module MD-02 under top shelf; 2) install foldable work surface FS-12 at 36 in. height; 3) connect integrated power outlet PO-110 to 120V supply. Wheels rated for rough terrain, 8 in. rubber casters, allow movement across gravel and mud. For secure tool storage, label compartments and use foam inserts cut to 36×6 in. dimensions. Mobile workstations reduce transit time and improve organization on site. Maintenance requires periodic wheel bearings lubrication every 200 hours. For enhanced durability on job sites, consider models with IP65-rated construction to protect against dust and water.
Protecting, Coiling, and Storing Extension Cords Properly
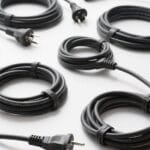
Protect extension cords by using cord reels (model CR-200) and spool organizers (SP-36) to prevent tangles and kinks, aiding storage. Coil cords loosely in a figure-eight, leaving 4 to 6 inches of slack at each end to reduce stress and wear. For storage solutions, label cords with length and purpose using 1-inch vinyl tags and a permanent marker for quick identification. Hang coiled cords on wall-mounted hooks spaced 12 inches apart on a pegboard or on a 2×4 rail for neat organization. Store cords in a cool, dry room below 80°F, away from direct sunlight, on shelves or in labeled bins to extend lifespan. Inspect cords quarterly, look for nicks, exposed wire, or stiffness, and replace any unit showing insulation damage or compromised grounding. For labeling durability, use writable surfaces like those recommended for tapes, such as a permanent marker on vinyl tags for long-lasting identification.
Simple DIY Storage Builds for Tight Garages
A tight garage benefits from compact DIY storage builds that use vertical shelving, tool tubes, cubbies, overhead racks, and adjustable pegboard systems. Install 12-inch deep wall-mounted shelving (2×8 pine, SKU PINE-2×8-96) at 72 inches high, studs at 16 inches on center, using 3-inch wood screws. Create tool tubes from 12-inch diameter concrete-forming tubes, cut to 48 inches, elevated on 2×4 cleats 6 inches off the floor. Build a cubby unit 24x36x18 inches for small accessories, with 6-inch square compartments, fastened with pocket screws. Mount overhead storage racks rated 300 lb (model OR-300) 12 inches above vehicle clearance. Attach adjustable pegboard panels with 1-inch brackets to allow tool repositioning. These DIY projects deliver organized, accessible gear while preserving floor space and simplify routine maintenance tasks. Proper surface preparation is essential for achieving long-lasting adhesion and durability when installing storage components and any floor-marking tapes used nearby.
Safety Guidelines and Electrical Best Practices
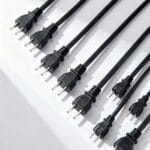
After installing wall shelves, pegboard, and overhead racks, occupants should follow electrical safety and cord best practices when powering tools. The guide lists safety guidelines to reduce electrical hazards and guarantee proper outlet placement. Step 1: select cords rated for device amperage, e.g., 12 AWG for tools drawing up to 20 A, model UL-EC12 or equivalent. Step 2: measure run length; keep cords under 25 ft to reduce voltage drop. Step 3: inspect cords weekly for frayed insulation or exposed wires and replace immediately. Step 4: avoid daisy-chaining cords; use a single cord per device. Keep cords dry and use outdoor-rated cords (marked “W” or GFCI protected) for exterior use. Always store cords coiled on reels mounted to pegboard as storage solutions, code PR-6. For sensitive devices, consider surge protectors with joule ratings of 600–1080 J for better protection.
Seasonal Rotation and Space-Saving Strategies
How should occupants arrange seasonal extension gear to balance quick access and maximum space savings using vertical and labeled storage? Occupants place frequently used items at ground level and rare seasonal items above six feet on shelves. Use clear plastic bins 18x12x12 inches, code BIN-181212, labeled with season and contents on short sides. Install wall-mounted shelves as storage solutions, rated 50 lb per shelf, model WM-50, spaced 18 inches vertically for efficient vertical storage. Hang pegboard panels 2×4 ft, code PB-24, for cords, hoses, adapters, and other small tools. Stack collapsible bins when not in use, fold to 2 inches thick to free floor area and for shelving access. Conduct scheduled reviews every 90 days during seasonal change to inspect, repair, tag, or replace gear.
Frequently Asked Questions
How Do I Recycle or Dispose of Damaged Extension Cords Responsibly?
They should take damaged extension cords to recycling centers or collection events, evaluate reuse options for nonfunctional parts, never discard them as regular trash, and treat unknown components as hazardous waste per local guidelines promptly.
Can Extension Cord Storage Affect Homeowners Insurance or Liability Coverage?
A homeowner should note that improper extension cord storage can influence insurance implications and liability considerations; insurers may deny claims or adjust premiums if negligence contributes to a loss, and coverage limits determine claim payouts.
What Are Theft-Prevention Options for Expensive Power Tools and Cords?
Like a fortress guarding treasures, they recommend lockable storage, discreet security cameras, alarmed cases, and tool tracking systems; marking, inventorying, bolting items, using offsite storage minimize theft risk and aid recovery and prompt insurance notifications.
Are There Smart or App-Connected Cord Reels for Remote Control and Monitoring?
They confirm smart reels exist with app features and remote management, offering real-time status, usage logs, geofencing, and motorized retraction control via smartphone, often integrating theft alerts, firmware updates, and access permissions for professional fleets.
How Should I Store Extension Cords Used in Hazardous or Corrosive Environments?
They should be stored as if guarding treasures from acid rain: sealed in labeled, elevated, corrosion-resistant cabinets with desiccants, clear barriers against corrosive materials, moisture protection, and shields from UV exposure; periodic inspection guarantees integrity.