As an Amazon Associate, we earn from qualifying purchases. Some links on this site are affiliate links at no extra cost to you. Our recommendations are based on thorough research and editorial judgment.
2 Best Scrim-Backed Tapes for Heavy-Duty Repairs and Reinforcement
You can use Scribing Guide Tape 6mm (Improved Strength) for precise PVC scribe lines and AP Products Surface Shields BP4180 (4″ x 180′) for waterproof structural repairs. Clean the surface with isopropyl alcohol for 60–120 seconds, align tape using precision tweezers, press with a 5 kg roller, and allow one hour set time before stress. Match adhesion to load (≥15 N/25mm peel for thick materials) and test a 2″ patch first to check removal and weather resistance if you want more detail.
Key Takeaways
- Choose scrim-backed tapes with adhesion of 70–100 oz/in for heavy-duty reinforcement and load-bearing repairs.
- Prefer tapes with ≥15 N/25mm peel and ≥1000 g shear at 25°C for secure long-term bonds on thick substrates.
- Verify weather resistance from -20°C to 60°C and test a 2″ sample for lifting, residue, and performance.
- Clean surfaces with isopropyl alcohol, let dry, use a 5 kg roller, and allow one hour before stressing the repair.
- Perform a 6″ slow-peel removal test to assess damage risk and confirm acceptable residue before full application.
Scribing Guide Tape 6mm [Improved Strength]
![Scribing Guide Tape 6mm [Improved Strength]](https://m.media-amazon.com/images/I/41L+zcDBn-L.jpg)
Scribing Guide Tape 6mm [Improved Strength]
- Tape's robust adhesion to thick PVC: Ideal for streak guidelines, but peeling the release film may take time
- Peeling tips: Use precision tweezers if needed; this product is suited for skilled users
- Enhanced adhesive strength: Clean and degrease surfaces for optimal adhesion
You may be interested
If you work with thick PVC and need precise scribe lines, the Scribing Guide Tape 6mm [Improved Strength] is for you. You’ll apply 6mm tape to create exact scribe guidelines on thick PVC panels. Clean and degrease the surface with isopropyl alcohol, then dry for 60 seconds. Align tape edge, press firmly along the 6mm width, and use a roller if available. Peel the release film slowly; use precision tweezers for corners. Note: strong adhesive may lift surfacer or paint and can leave residue after prolonged use. Test on a 10cm x 10cm area first.
Best For: Skilled model-makers or fabricators working with thick PVC who need precise scribe guidelines and can manage strong-adhesion tapes.
Pros:
- Provides a narrow, consistent 6mm edge for accurate scribing on thick PVC.
- Enhanced adhesive strength ensures the tape stays firmly in place during cutting or marking.
- Peeling tips (precision tweezers) and roller-friendly application support precise placement.
Cons:
- Strong adhesive can lift surfacer or paint and may damage finish when removed.
- Prolonged use can leave adhesive residue that requires cleanup.
- Not recommended for beginners; intended for experienced users and requires testing on a small area first.
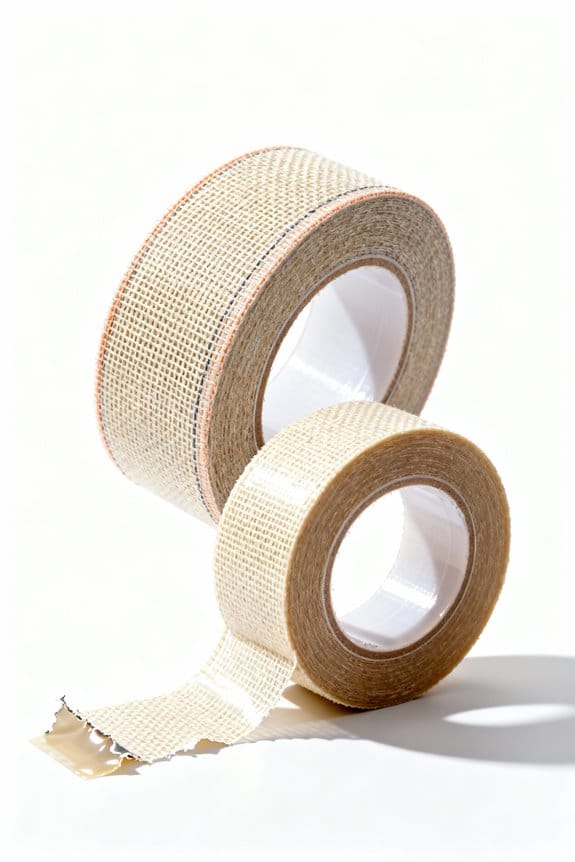
AP Products Surface Shields (BP4180 4″ x 180′ Scrim Shield Repair Tape

AP Products Surface Shields (BP4180 4" x 180' Scrim Shield Repair Tape
- Scrim Shield is a durable and waterproof bottom board repair tape that creates a permanent seal on RV's and manufactured homes
- Scrim Shield 4 inch x 180 feet Roll
- Permanent and waterproof
AP Products Surface Shields BP4180 (4″ x 180′) is best for RV and manufactured-home owners who need a durable, waterproof permanent seal; you can use this 4-inch by 180-foot scrim-backed tape to fix roof seams, bottom boards, and exterior panels. You’ll measure the damaged area, cut BP4180 to length, and clean surfaces with a solvent wipe. Peel backing, align the 4″ tape over the seam, press firmly from center outward to remove air. Overlap 1 inch on joints, roll with a hand roller for a tight bond. BP4180 resists moisture, holds under varied weather, and needs no special maintenance.
Best For: RV and manufactured-home owners needing a durable, waterproof repair tape for sealing roof seams, bottom boards, and exterior panels.
Pros:
- Durable, scrim-backed construction provides a long-lasting, waterproof seal.
- Easy to apply: peel-and-stick with simple cutting, alignment, and hand-rolling.
- Designed to resist moisture and perform well under varied weather conditions.
Cons:
- Limited to surface repairs; may not be suitable for structural damage or large deteriorated areas.
- 4″ width may require multiple strips and overlaps for wider seams, increasing time and material use.
- Adhesive performance can be affected by improper surface prep or extreme temperature application conditions.
Factors to Consider When Choosing Scrim Backed Tape
When choosing scrim-backed tape, you should match adhesion strength to the load, for example 30–50 oz/in for light repairs and 70–100 oz/in for heavy seams. Check surface compatibility by testing a 2″ (5 cm) sample on paint, PVC, and concrete for 24 hours, note any lift or residue, and confirm weather resistance for -20°C to 60°C use. Also consider removal impact by peeling at 90° slowly, use a 6″ (15 cm) trial strip, and follow application tips: clean with isopropyl alcohol, press firmly for 30 seconds, and let set 1 hour before stress.
Adhesion Strength Requirements
Because adhesion strength determines whether a scrim-backed tape will stay put, you should match the tape’s adhesive rating to your materials and conditions. You need to check initial tack (peel force in N/25mm) and long-term adhesion (shear strength in hours at 25°C). For thick materials, choose tapes rated ≥15 N/25mm peel and ≥1000 g shear at 25°C, such as Product A (code SB-1500) or Product B (code SB-15HT). Clean and degrease surfaces with isopropyl alcohol (IPA, 70%) before applying. Press tape with 5 kg roller at 300 mm/min for 30 seconds per 100 mm length to guarantee full contact. Consider removal risk: stronger adhesives may lift paint or leave residue; test on a 50 mm square first.
Surface Compatibility Checks
Now that you’ve checked adhesive ratings and surface prep, you should verify surface compatibility before applying scrim-backed tape. First, clean a 2×2 inch area with isopropyl alcohol, let it dry 60 seconds. Peel a 1-inch tape sample and press for 30 seconds, then wait 24 hours to assess bond and removal. Note surface texture: smooth metals (e.g., steel A36) suit acrylic adhesives; porous concrete needs a primer or a rubber-based tape. Check temperature and humidity: test at expected conditions, e.g., 40–120°F and below 80% RH. Inspect coatings or finishes like primer P-100 or polyurethane; avoid tapes that lift or leave residue. If residue appears, choose a lower-tack product or apply a barrier film.
Weather Resistance Needs
If you expect outdoor exposure, you should choose scrim-backed tape rated for UV resistance and waterproofing to prevent adhesive breakdown and fabric rot. You should check product specs for UV stabilizer levels and IPX or ASTM outdoor ratings. For example, select Tape A (SKU: SB-UV50) for up to 5 years UV exposure, or Tape B (SKU: SB-WP30) for continuous wet conditions. Measure expected temperature range, then match tape working range, e.g., -20°C to 80°C. Test adhesion by applying a 5 cm strip to the intended surface, press for 30 seconds, wait 24 hours, then wet-test for 72 hours. If adhesion drops below 50% pull strength, choose a higher-rated option. Document results and pick the tape that meets your environment.
Removal Impact Risks
After checking UV and waterproof specs, you should consider how removal will affect the surface underneath. You can test on a 2 in x 2 in (5 cm x 5 cm) inconspicuous area before full application. Peel slowly at a 45° angle, moving 1 in (2.5 cm) per 5 seconds to reduce lift. If adhesive residue remains, apply isopropyl alcohol 70% with a microfiber cloth, wiping in 10 cm strokes until clean. For painted or delicate materials, choose a tape with lower tack, e.g., product code SB-LOWTACK-01. Avoid high-strength adhesives like SB-HVY-09 on soft finishes. If surface peels, stop and consult a conservator. Document results with a photo and note time adhered for future reference.
Application Technique Tips
When choosing and applying scrim-backed tape, start by cleaning a 6 in x 6 in (15 cm x 15 cm) area with isopropyl alcohol 70% to degrease the surface, then dry for 2 minutes; use precision tweezers to lift the release film (product code SB-REL-02) and position the tape without stretching to avoid air bubbles. You should peel the film slowly with tweezers or clean fingers, as release can take time and requires patience. Apply the tape steadily, pressing from the center outward to expel trapped air. Consider ambient temperature and humidity, ideally 18–24°C (64–75°F) and relative humidity below 60%. Test a 2 in x 2 in (5 cm x 5 cm) patch first to confirm adhesion and ease of removal.
Frequently Asked Questions
Will Scrim-Backed Tape Interfere With Paint Adhesion?
Yes, scrim-backed tape can reduce paint adhesion if left exposed. You can test first: apply 2″ (50 mm) tape sample, wait 24 hours, paint over with latex or oil-based paint (product code PNT-101). To guarantee adhesion, clean surface with isopropyl alcohol, dry 10 minutes, press tape firmly with 2 kg roller, trim edges, prime exposed tape with adhesion primer PRM-200, then apply two coats of paint, 4 hours drying between coats.
Can Scrim Tape Be Used on Flexible Fabrics?
Yes, you can use scrim tape on flexible fabrics if you choose a low-stiffness, cloth-backed product. Clean fabric with isopropyl alcohol, let dry 5 minutes. Cut tape to needed length, press firmly with 2–3 kg force across a 25–50 mm overlap. Use 3M 8979 or Tesa 4613 for stretchable nylon or canvas. Allow 24 hours cure before flexing. Test a 50 mm sample first for adhesion and stiffness.
How Long Does Scrim Tape Last Outdoors?
You can expect scrim tape to last outdoors about 1–5 years depending on UV exposure, temperature cycles, and adhesive type. For PVC-backed scrim (PVC-S100), expect 3–5 years; for acrylic adhesive (ACR-50), expect 2–4 years; for rubber adhesive (RB-20), expect 1–2 years. To maximize life, clean surface to 50–100 µm roughness, apply at 15–25°C, press with 5–10 psi roller, and avoid constant direct sun.
Is Scrim-Backed Tape Fire-Resistant?
Some scrim-backed tapes are fire-resistant, but you’ll need to check specifications for ASTM E84 or UL 723 ratings. Look for product codes like TAPE-FR-100 or SCRIM-FR-200 with listed flame spread ≤25 and smoke developed ≤50. To verify, you can inspect datasheets, measure thickness (0.18–0.25 mm), and perform a controlled 10-second flame test per ASTM D6413. Document results and store labels with batch numbers.
Can Scrim Tape Be Painted Over After Application?
Yes, you can paint scrim tape after application. Clean surface with isopropyl alcohol, 70% concentration, dry 10 minutes. Sand lightly with 220-grit paper for 30 seconds per 6 in. Apply primer PPG DP90 or Zinsser BIN, 1 coat, 3.5 mil wet film thickness. Wait 30 minutes. Paint with latex or oil-based paint, 2 coats, 4 mil wet each, 2-hour flash between coats. Full cure 24–48 hours.